8. [DocR] Graphical User Interface for ADAO (GUI/EFICAS)
This section presents the usage of the ADAO module in SALOME platform. Here we describe the general progression to establish an ADAO case, the details being given in the following chapters. It is completed by the detailed description of all the commands and keywords in the section [DocR] Reference description of the ADAO commands and keywords, by advanced usage procedures in the section [DocU] Advanced usage of the ADAO module and interoperability, and by examples in the section [DocU] Tutorials on using the ADAO module in SALOME.
8.1. Logical procedure to build an ADAO case
The construction of an ADAO case follows a simple approach to define the set of input data, and then generates a complete executable block diagram used in YACS 1. Many variations exist for the definition of input data, but the logical sequence remains unchanged.
First of all, the user is considered to know its personal input data needed to set up the data assimilation study, following [DocT] Methodology to elaborate a Data Assimilation or Optimization study. These data can already be available in SALOME or not.
Basically, the procedure of using ADAO involves the following steps:
Each step will be detailed in the next section.
8.2. Detailed procedure to build an ADAO case
8.2.1. STEP 1: Activate the ADAO module and use the editor GUI
As always for a module, it has to be activated by choosing the appropriate module button (or the menu) in the toolbar of SALOME. If there is no SALOME study loaded, a popup appears, allowing to choose between creating a new study, or opening an already existing one:
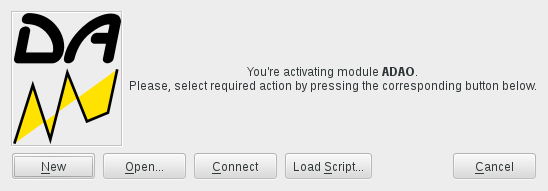
Activating the module ADAO in SALOME
Choosing the “New” button, an embedded case editor 2 will be opened, along
with the standard “Object browser”. You can then click on the “New” button
 (or choose the “New” entry in the “ADAO” main menu) to create
a new ADAO case, and you will see:
(or choose the “New” entry in the “ADAO” main menu) to create
a new ADAO case, and you will see:

The embedded editor for cases definition in module ADAO
8.2.2. STEP 2: Build and modify the ADAO case, and save it
To build a case using the embedded editor, you have to go through a series of sub-steps, by selecting, at each sub-step, a keyword and then filling in its value. It is noted that it is in this step that is needed, among other things, to define the call to the simulation code used in observation or evolution operators describing the problem 3.
The structured editor indicates hierarchical types, values or keywords allowed. Incomplete or incorrect keywords are identified by a visual error red flag. Possible values are indicated for keywords defined with a limited list of values, and adapted entries are given for the other keywords. Some help messages are contextually provided in the editor reserved places.
A new case is set up with the minimal list of commands. All the mandatory commands or keywords are already present, none of them can be suppressed. Optional keywords can be added by choosing them in a list of suggestions of allowed ones for the main command, for example the “ASSIMILATION_STUDY” command. As an example, one can add parameters in the “AlgorithmParameters” keyword, as described in the last part of the section [DocU] Tutorials on using the ADAO module in SALOME.
At the end, when all fields or keywords have been correctly defined, each line of the commands tree must have a green flag. This indicates that the whole case is valid and completed (and can be saved).

Example of a valid ADAO case
Finally, you have to save your ADAO case by pushing the “Save” button
 , or the “Save as” button
  , or by choosing the
“Save/Save as” entry in the “ADAO” menu. You will be prompted for a
location in your file tree and a name, that will be completed by a “.comm”
extension used for the embedded case editor. This will generate a pair of files
describing the ADAO case, with the same base name, the first one being
completed by a “.comm” extension and the second one by a “.py” extension
4.
, or by choosing the
“Save/Save as” entry in the “ADAO” menu. You will be prompted for a
location in your file tree and a name, that will be completed by a “.comm”
extension used for the embedded case editor. This will generate a pair of files
describing the ADAO case, with the same base name, the first one being
completed by a “.comm” extension and the second one by a “.py” extension
4.
8.2.3. STEP 3: Export the ADAO case as a YACS scheme
When the ADAO case is completed, you have to export it as a YACS scheme in
order to execute the data assimilation calculation. This can be easily done by
using the “Export to YACS” button  , or equivalently choose the
“Export to YACS” entry in the “ADAO” main menu, or in the contextual case
menu in the SALOME object browser.
, or equivalently choose the
“Export to YACS” entry in the “ADAO” main menu, or in the contextual case
menu in the SALOME object browser.

“Export to YACS” sub-menu to generate the YACS scheme from the ADAO case
This will lead to automatically generate a YACS scheme, and open the YACS module on this scheme. The YACS file, associated with the scheme, will be stored in the same directory and with the same base name as the ADAO saved case, only changing its extension to “.xml”. Be careful, if the XML file name already exist, the file will be overwritten without prompting for replacing the XML file.
8.2.4. STEP 4: Supplement and modify the YACS scheme, and save it
When the YACS scheme is generated and opened in SALOME through the YACS module GUI, you can modify or supplement the scheme like any standard YACS scheme. Nodes or blocs can be added, copied or modified to elaborate complex analysis, or to insert data assimilation or optimization capabilities into more complex YACS calculation schemes. It is recommended to save the modified scheme with a new name, in order to preserve the XML file in the case you re-export the ADAO case to YACS.
The main supplement needed in the YACS scheme is a post-processing step. The evaluation of the results has to be done in the physical context of the simulation used by the data assimilation procedure. The post-processing can be provided through the “UserPostAnalysis” ADAO keyword as a script or a string, by templates, or can be build as YACS nodes. These two ways of building the post-processing can use all the SALOME possibilities. See the part describing Variables and information available at the output, or the help for each algorithm, for the full description of these elements.
In practice, the YACS scheme has an “algoResults” output port of the computation bloc, which gives access to a structured object named hereafter “ADD” for example, containing all the calculation results. These results can be obtained by retrieving the named variables stored along the calculation. The main information is the “Analysis” one, that can be obtained by the python command (for example in an in-line script node or a script provided through the “UserPostAnalysis” keyword):
Analysis = ADD.get("Analysis")[:]
“Analysis” is a complex object, similar to a list of values calculated at each step of data assimilation calculation. In order to get and print the optimal data assimilation state evaluation, in a script provided through the “UserPostAnalysis” keyword, one can use:
Xa = ADD.get("Analysis")[-1]
print("Optimal state:", Xa)
print()
This Xa variable is a vector of values, that represents the solution of the
data assimilation or optimization evaluation problem, noted as
 in the section [DocT] A brief introduction to Data Assimilation and Optimization.
Such method can be used to print results, or to convert these ones to structures that can be used in the native or external SALOME post-processing. A simple example is given in the section [DocU] Tutorials on using the ADAO module in SALOME.
8.2.5. STEP 5: Execute the YACS case and obtain the results
The YACS scheme is now complete and can be executed. Parametrization and execution of this YACS case is fully compliant with the standard way to deal with a YACS scheme, as described in the YACS module User’s Guide.
To recall the simplest way to proceed, the YACS scheme has to be compiled using
the button  , or the equivalent YACS menu entry, to prepare the
scheme to run. Then the compiled scheme can be started, executed step by step
or using breakpoints, etc.
, or the equivalent YACS menu entry, to prepare the
scheme to run. Then the compiled scheme can be started, executed step by step
or using breakpoints, etc.
The standard output will be pushed into the “YACS Container Log”, obtained through the right click menu of the “proc” window in the YACS GUI. The errors are shown either in the “YACS Container Log”, or at the command line in the terminal window (if SALOME has been launched by its explicit command, and not by a menu or a desktop icon). As an example, the output of the above simple case is of the following form:
Entering in the assimilation study
Name is set to........: Test
Algorithm is set to...: Blue
Launching the analysis

Optimal state: [0.5, 0.5, 0.5]
shown in the “YACS Container Log”.
The execution can also be done using a Shell script, as described in the section [DocU] Advanced usage of the ADAO module and interoperability.
- 1
For more information on YACS, see the YACS module and its integrated help available from the main menu Help of the SALOME platform.
- 2
For more information on the embedded case editor, see the EFICAS module and its integrated help available from the main menu Help of the SALOME platform.
- 3
The use of physical simulation code in the data assimilation elementary operators is illustrated or described in the following main parts.
- 4
This intermediary python file can also be used as described in the section [DocU] Advanced usage of the ADAO module and interoperability.